
This past Saturday I taught a workshop on the One Block Wonder Technique at the Eastern branch of the Irish Patchwork Society. It was a busy but satisfying day and I think the participants enjoyed it. I don't have a lot of photos from the day, but I thought I'd share those which have resulting blocks in them (pity I don't have everybody's), as well as the tips we were able to take away from the day.


I'm really looking forward to seeing the finished quilts, though finalizing the layouts may take quite some time.
This is a picture I wanted to print out, but didn't manage to get to the printers'. It sums up what we did on the day very well (both the picture and the phrase were found on the Web).

I will not run through the whole process of making a One Block Wonder quilt (there are a lot of tutorials around on the Web), but I do want to share some tips which proved handy and/or were learned the hard way.

1. When choosing the fabric, pay attention to its color way - the pattern will change beyond all recognition, but the colors will stay the same.

2. For the first stage of the process - identifying your pattern repeat - it's handy to use a tailor's yardstick or any piece of board/plank that has a long straight edge. Alternatively, you can tape together two quilting rulers.

3. Some fabrics have their prints printed straighter than others. Don't be afraid to shift and wiggle your fabric to align the pattern. Once it's aligned, handle it with care to keep it that way.
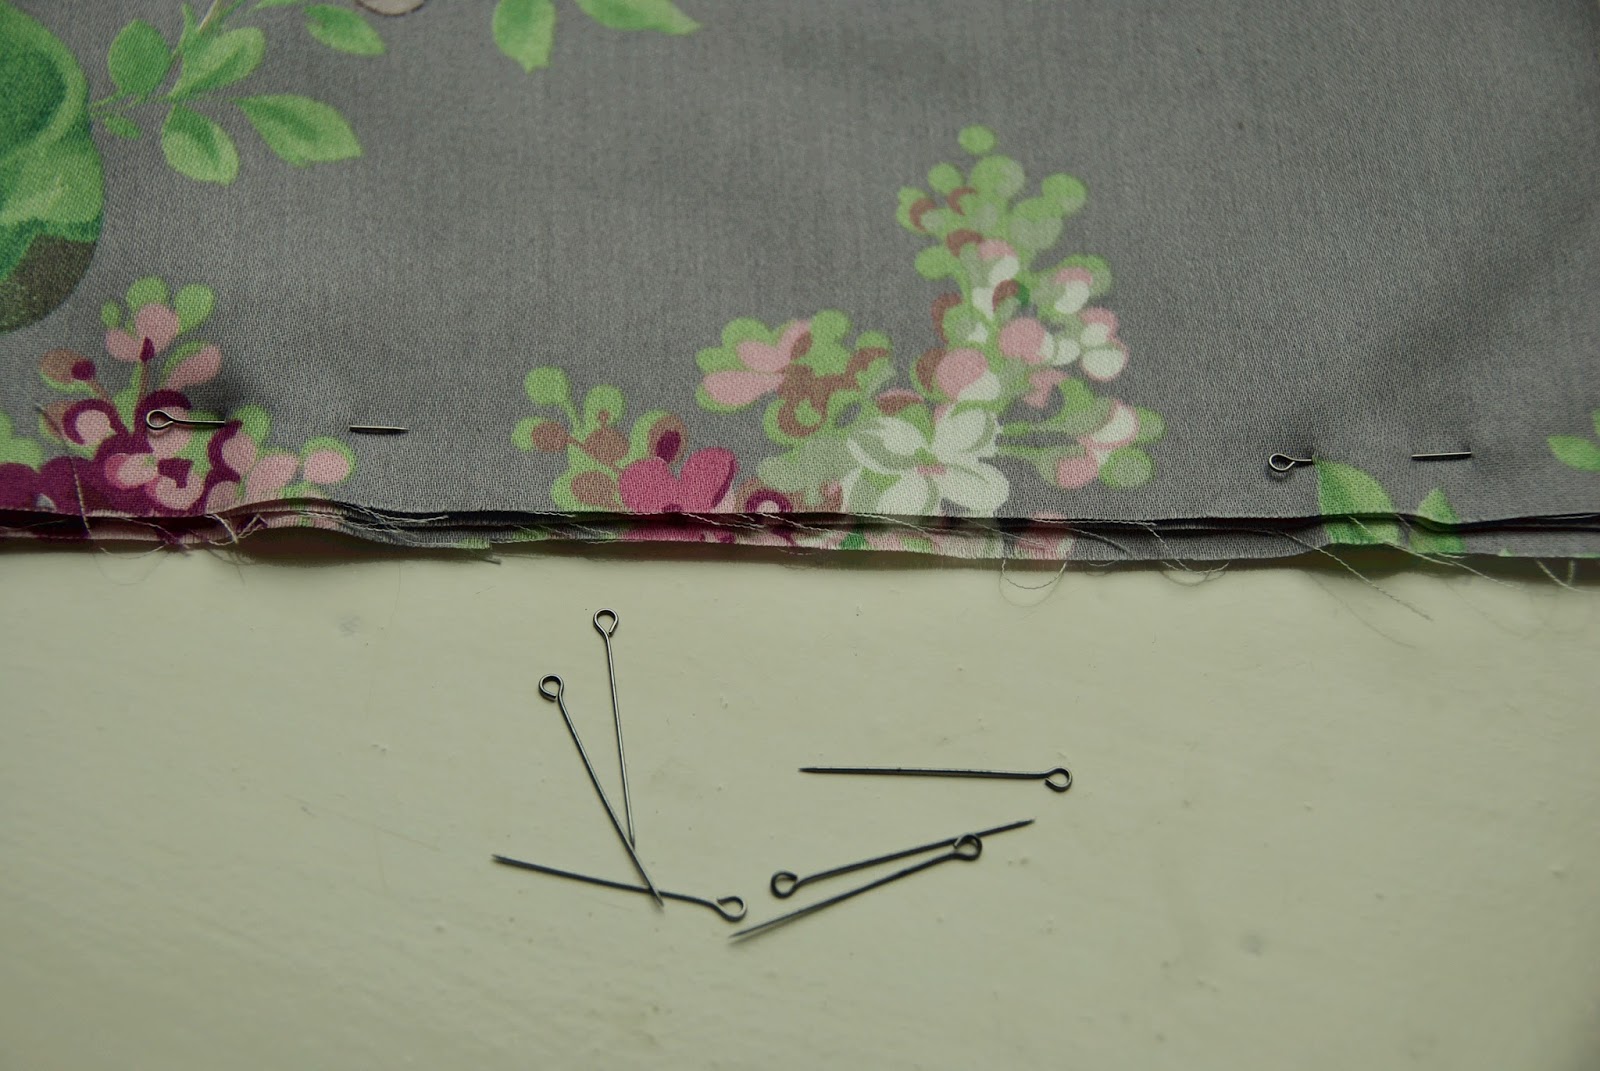
4. Use flat pins to keep together your six layers while you're cutting. They don't have to be removed from the fabric when they get under the ruler, so your strips will remain aligned and won't shift.

5. Although most tutorials call for cutting 3 3/4 in strips, you don't really have to stick to this number. Measure the width of your repeat - in some fabrics it will not divide by 3 3/4, so to avoid wasting too much of your fabric you can choose a different strip width, say 3 1/2 in of maybe 4 in. Another thing to consider is the scale of your pattern. If it's on the smallish side, decrease the width of your strips.

7. Make sure your ruler has a horizontal line matching the edge of your strip. If it doesn't, create a line by sticking a piece of tape to the ruler - this will ensure all of the angles in your triangles are 60 degrees, and thus, all of the sides in your triangles are equal.

8. When piecing your triangles keep them in strict order, and always keep the center corners facing one way (for example, away from you) or mark the center corners with a pin, then your piecing process will be fast and smooth.
9. After you've assembled and pressed your half-hexies, keep them together with a piece of masking tape on the back while you're playing with the layout.

10. The layout is a very personal process, but I would still point out two important things - lay out all your blocks to see if there is any "focal" color that really jumps out at you; if there is, start the composition with the blocks that have most of this focal color and create some sort of shape of line with them, then arrange the other blocks around.


I'm really looking forward to seeing the finished quilts, though finalizing the layouts may take quite some time.
This is a picture I wanted to print out, but didn't manage to get to the printers'. It sums up what we did on the day very well (both the picture and the phrase were found on the Web).

I will not run through the whole process of making a One Block Wonder quilt (there are a lot of tutorials around on the Web), but I do want to share some tips which proved handy and/or were learned the hard way.

1. When choosing the fabric, pay attention to its color way - the pattern will change beyond all recognition, but the colors will stay the same.


4. Use flat pins to keep together your six layers while you're cutting. They don't have to be removed from the fabric when they get under the ruler, so your strips will remain aligned and won't shift.
5. Although most tutorials call for cutting 3 3/4 in strips, you don't really have to stick to this number. Measure the width of your repeat - in some fabrics it will not divide by 3 3/4, so to avoid wasting too much of your fabric you can choose a different strip width, say 3 1/2 in of maybe 4 in. Another thing to consider is the scale of your pattern. If it's on the smallish side, decrease the width of your strips.
6. Using a 60 degree triangle ruler with a "blunted" corner saves you a bit of fabric width when cutting the triangles. The blunted corner can also be handy to mark your central corner when piecing the triangles together. However, you don't really need a special ruler for this technique, any ruler with a a 60 degree line on it will do the job too.

7. Make sure your ruler has a horizontal line matching the edge of your strip. If it doesn't, create a line by sticking a piece of tape to the ruler - this will ensure all of the angles in your triangles are 60 degrees, and thus, all of the sides in your triangles are equal.

8. When piecing your triangles keep them in strict order, and always keep the center corners facing one way (for example, away from you) or mark the center corners with a pin, then your piecing process will be fast and smooth.
9. After you've assembled and pressed your half-hexies, keep them together with a piece of masking tape on the back while you're playing with the layout.

10. The layout is a very personal process, but I would still point out two important things - lay out all your blocks to see if there is any "focal" color that really jumps out at you; if there is, start the composition with the blocks that have most of this focal color and create some sort of shape of line with them, then arrange the other blocks around.
 |
| This is a quilt I made before with the same lilac fabric. I chose to arrange the purple/pink blocks in a sort of wave with the greens supporting the shape. |
11. When playing with the layout, snap photos of every variant, even if you don't really like it - the pictures make it easier to evaluate, compare and discuss your layout with other people, you might spot something you can't see up close and personal.
On the whole this is a very fast and satisfying technique, definitely worth trying, at least to gain a new perspective on the use of pattern in fabric and the potential of fabrics you probably never considered suitable for quilting.
UPD: If you're wondering what came out of that fabric, here's the finally finished quilt
Linking up to Tips and Tutorials Tuesday at Quilting Jetgirl
UPD: If you're wondering what came out of that fabric, here's the finally finished quilt
Linking up to Tips and Tutorials Tuesday at Quilting Jetgirl
This is a great series of tips, I especially like the tape trick to keep the hexie halves together. I hope the class was a fun day of sewing, and thank you so much for linking up!
ReplyDeleteLooks like a brilliant and fun day - thanks for all the tips!
ReplyDeleteDid mine 8 years ago and had such fun at the workshop. You were only allowed one piece of fabric so you had to choose carefully. Mine was roses on a black background and came out looking amazing, the only piece of material I found with a12" repeat
ReplyDeleteHow much yardage is need for a OBW lap quilt? Do you get the same amount as you normally would for that size quilt or do you need more? Thanks!
ReplyDeleteDepends on the pattern repeat. You need 6 layers.
DeleteGreat tips and pictures. Now I have incentive to finish the one I cut out 4 years ago! Thanks
ReplyDeleteThanks for these tips. Definitely on my todo list :)
ReplyDeleteI found it such a difficult process. I think first of all , the fabric moved while cutting. Also it is so important that your seams are exactly one quarter inch!
ReplyDelete